Guild War Top 10 Attack Teams
Explore ten Guild War attack teams and their recorded results.
Last Updated: Sept 2026
Featured Infographic
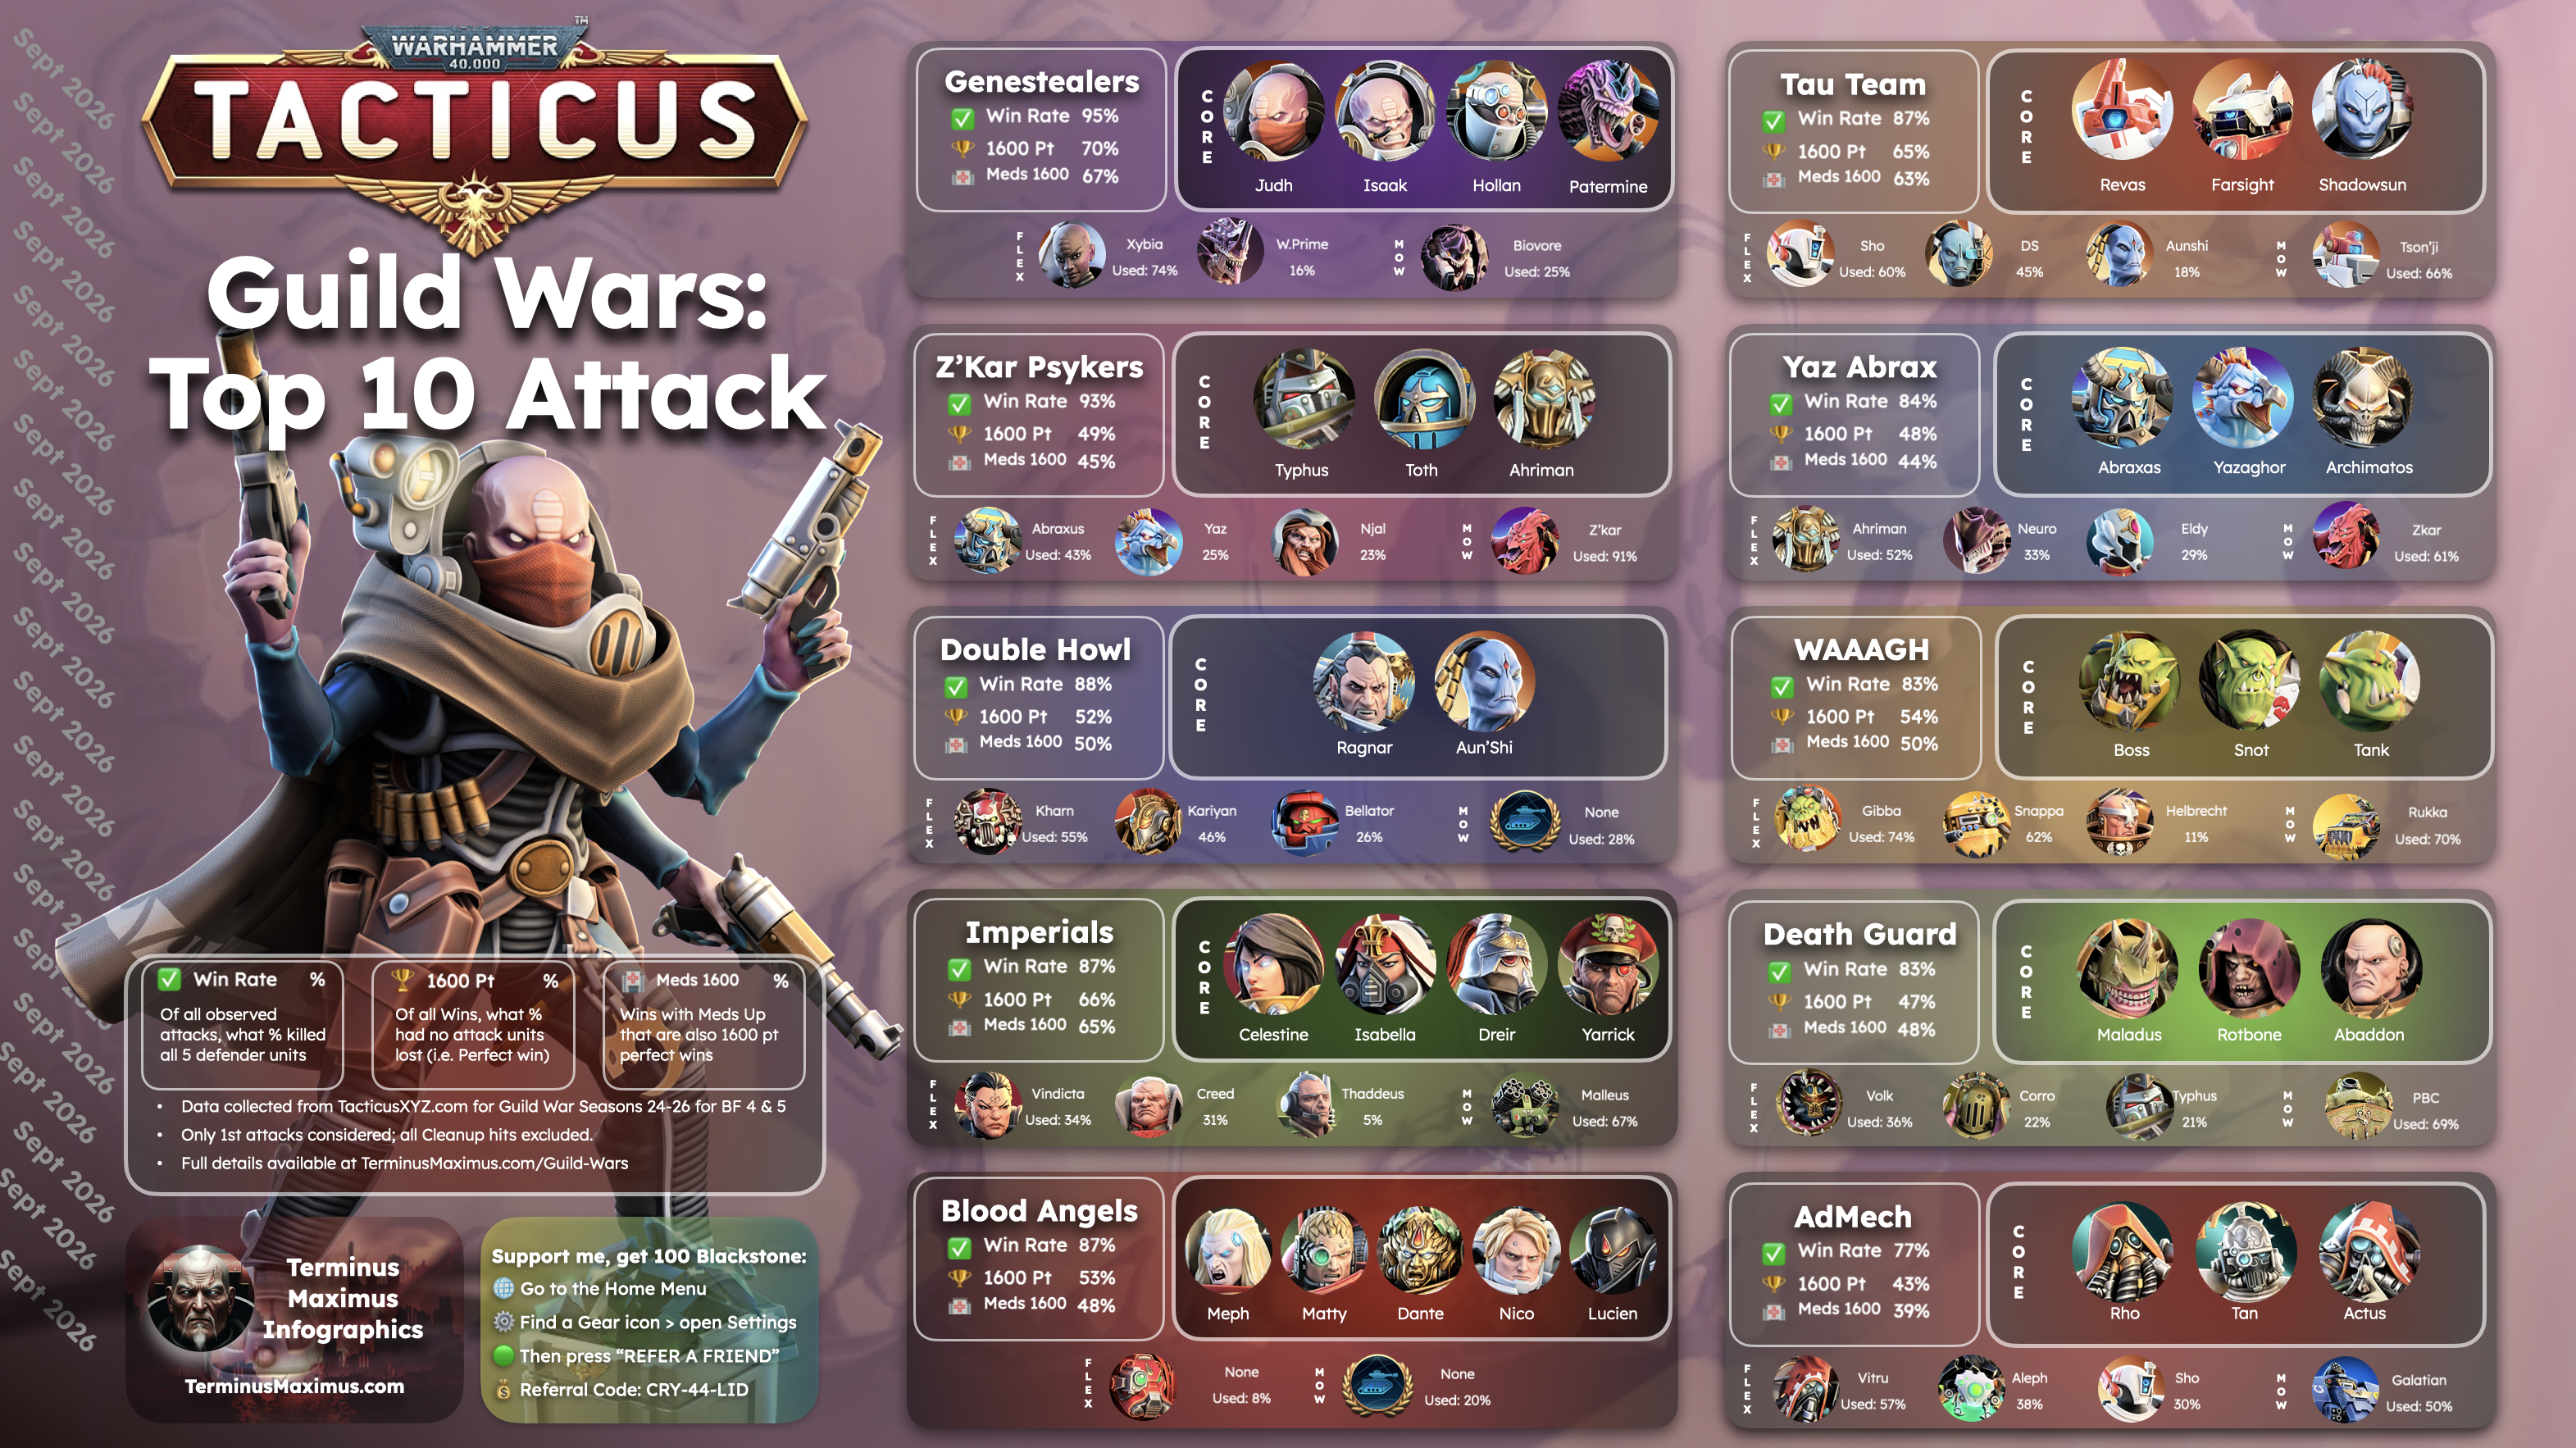
Methods & Definitions
See where the Guild Wars attack data comes from, what each metric means, and how to interpret the team results and popular options.
Criteria
- 10 distinct team cores. Strong performance and breadth of evidence shaped the 2-5 character cores, with no repeated core heroes.
- Clear Rate shaped the original selection. Defeating all five defenders counted as a win, with or without attacker losses. Perfect wins tracked clears with zero losses, and results were checked across multiple wars. Genestealers and Blood Angels now use the requested fixed rosters.
- Complete battle records. Cleanup attacks and incomplete records were excluded; both wins and failures counted.
Data Sources
Source: TacticusXYZ. Detailed results use the source counts.
- Edition
- September 2026
- Seasons
- 24–26
- Battlefield tiers
- 4–5
- Recorded wars
- 141
- Eligible non-cleanup attacks
- 60,641
Metrics Explained
- Clear
- All five defenders defeated. Includes Perfect clears and clears with deaths.
- Clear rate
- Clears / eligible attempts containing the whole core, including failures.
- Perfect
- A clear with all five attacking characters surviving in the recorded final state.
- Perfect share of wins
- Perfect clears / all clears.
- Meds Up
- At least one recorded Defender Health (Medicae) buff.
- Meds Up clear rate
- Meds Up clears / Meds Up attempts, including failures.
- Perfect share of Meds Up wins
- Perfect Meds Up clears / all Meds Up clears.
- Flex / MoW usage
- Matching attacks / all eligible attacks containing the core. Blood Angels flex usage uses its separately labelled pool with at least four of its five core heroes.
Methodology
- Core teams: Main metrics, Machines of War, and main exact-lineup tables include all heroes in the listed core. Eligible attacks exclude cleanups and include failures. Blood Angels also has separate flex evidence for at least four of its five core heroes, counting each attack once.
- Popular flex: Up to five heroes are shown, ranked by observed usage, with at least 3.8% occurrence. Shares can add up to more than 100% because teams have multiple flex slots.
- Machines of War: Up to three options are shown, ranked by observed usage, with at least 10% occurrence. Recorded support does not establish that its abilities were activated.
- No MoW deployed: This is the display label for attacks with no Machine of War recorded.
- Observed lineups: “Heroes exactly” shows actual five-hero teams with all Machines of War combined. “Complete Team exactly” preserves each lineup and its recorded support category.
- Evidence tables: The five most-used combinations are shown, ranked by attacks, then clear rate. Gold portrait borders identify the core heroes.
- Interpreting results: These results describe observed complete lineups and matchups. Popular flex choices do not guarantee that every combination works together.
01Genestealers
Core team
 Judh
Judh  Isaak
Isaak  Hollan
  The Patermine
 - Clear rate
- 95.2%2,886 / 3,033clears / attempts
- Perfect share of wins
- 70.1%2,024 / 2,886Perfect clears / clears
- Meds Up clear rate
- 93.9%1,846 / 1,965Meds Up clears / attempts
- Perfect share of Meds Up wins
- 67.0%1,237 / 1,846Perfect Meds Up clears / Meds Up clears
Popular flex options
-
 Xybia 74.0%2,244 attacks
 -
 Winged Prime 16.0%484 attacks
Machines of War
-
 Biovore 25.2%763 attacks
 -
 Malleus Rocket Launcher 18.1%548 attacks
 -
 Forgefiend 12.6%381 attacks
Heroes exactly
Top 5 of 53 observed combinations.
Scroll across to see all results.
| Full team (core + flex) | Attempts | Usage | Clears | Clear rate | Perfects | Failures |
|---|---|---|---|---|---|---|
| Judh Isaak Hollan The Patermine Xybia | 2,244 | 74.0% | 2,132 | 95.0% | 1,488 | 112 |
| Judh Isaak Hollan The Patermine Winged Prime | 484 | 16.0% | 468 | 96.7% | 345 | 16 |
Judh Isaak Hollan The Patermine  Lucius Lucius | 50 | 1.6% | 44 | 88.0% | 26 | 6 |
Judh Isaak Hollan The Patermine  Yarrick Yarrick | 37 | 1.2% | 35 | 94.6% | 22 | 2 |
Judh Isaak Hollan The Patermine  Dreir Dreir | 31 | 1.0% | 30 | 96.8% | 21 | 1 |
Complete Team exactly
Top 5 of 169 observed combinations.
Scroll across to see all results.
| Full team (core + flex) | Machine of War | Attempts | Usage | Clears | Clear rate | Perfects | Failures |
|---|---|---|---|---|---|---|---|
| Judh Isaak Hollan The Patermine Xybia | Biovore | 557 | 18.4% | 539 | 96.8% | 391 | 18 |
| Judh Isaak Hollan The Patermine Xybia | Malleus Rocket Launcher | 421 | 13.9% | 402 | 95.5% | 282 | 19 |
| Judh Isaak Hollan The Patermine Xybia | Forgefiend | 261 | 8.6% | 248 | 95.0% | 170 | 13 |
| Judh Isaak Hollan The Patermine Xybia | No MoW deployed | 258 | 8.5% | 240 | 93.0% | 165 | 18 |
| Judh Isaak Hollan The Patermine Xybia |  Tson'ji Tson'ji | 195 | 6.4% | 182 | 93.3% | 127 | 13 |
Hard Maps
| Clear rate | Map | Medicae | Attempts | Clears | Failures | Perfects | Clears with deaths |
|---|---|---|---|---|---|---|---|
| 94.9% | Hard map | No Meds Buff | 157 | 149 | 8 | 100 | 49 |
| 90.8% | Hard map | Meds Up | 273 | 248 | 25 | 150 | 98 |
| 97.8% | Normal map | No Meds Buff | 911 | 891 | 20 | 687 | 204 |
| 94.4% | Normal map | Meds Up | 1,692 | 1,598 | 94 | 1,087 | 511 |
Team Tips
- Heal Judh with Hollan before her burst turn—even at full health if she has not received his buff.
- Leave an adjacent hex where Hollan’s Aberrant can hit an enemy immediately; it cannot move on arrival.
- Check Overwatch before moving Judh; her defensive passive will not protect her during her own turn.
- Preserve Ambush escape space. Treat Judh’s return as a backup plan, not a guaranteed second active.
Community discussion: Judh counterplay and Ambush.
02Z’Kar Psykers
Core team
 Typhus
  Toth
Toth  Ahriman
 - Clear rate
- 93.1%326 / 350clears / attempts
- Perfect share of wins
- 49.1%160 / 326Perfect clears / clears
- Meds Up clear rate
- 92.6%188 / 203Meds Up clears / attempts
- Perfect share of Meds Up wins
- 45.2%85 / 188Perfect Meds Up clears / Meds Up clears
Popular flex options
-
 Abraxas 43.1%151 attacks
 -
 Yazaghor 25.4%89 attacks
 -
 Njal 23.1%81 attacks
 -
 Archimatos 16.6%58 attacks
 -
 Tigurius 16.0%56 attacks
Machines of War
-
 Z'kar 90.6%317 attacks
Heroes exactly
Top 5 of 91 observed combinations.
Scroll across to see all results.
| Full team (core + flex) | Attempts | Usage | Clears | Clear rate | Perfects | Failures |
|---|---|---|---|---|---|---|
| Typhus Toth Ahriman Abraxas Yazaghor | 89 | 25.4% | 83 | 93.3% | 38 | 6 |
| Typhus Toth Ahriman Archimatos Abraxas | 42 | 12.0% | 42 | 100.0% | 26 | 0 |
Typhus Toth Ahriman Njal  Neurothrope Neurothrope | 15 | 4.3% | 15 | 100.0% | 9 | 0 |
Typhus Toth Ahriman  Volk Tigurius Volk Tigurius | 14 | 4.0% | 13 | 92.9% | 8 | 1 |
Typhus Toth Ahriman  Thutmose Njal Thutmose Njal | 10 | 2.9% | 10 | 100.0% | 2 | 0 |
Complete Team exactly
Top 5 of 104 observed combinations.
Scroll across to see all results.
| Full team (core + flex) | Machine of War | Attempts | Usage | Clears | Clear rate | Perfects | Failures |
|---|---|---|---|---|---|---|---|
| Typhus Toth Ahriman Abraxas Yazaghor | Z'kar | 80 | 22.9% | 74 | 92.5% | 35 | 6 |
| Typhus Toth Ahriman Archimatos Abraxas | Z'kar | 39 | 11.1% | 39 | 100.0% | 24 | 0 |
| Typhus Toth Ahriman Njal Neurothrope | Z'kar | 15 | 4.3% | 15 | 100.0% | 9 | 0 |
| Typhus Toth Ahriman Volk Tigurius | Z'kar | 14 | 4.0% | 13 | 92.9% | 8 | 1 |
| Typhus Toth Ahriman Thutmose Njal | Z'kar | 10 | 2.9% | 10 | 100.0% | 2 | 0 |
Hard Maps
| Clear rate | Map | Medicae | Attempts | Clears | Failures | Perfects | Clears with deaths |
|---|---|---|---|---|---|---|---|
| 100.0% | Hard map | No Meds Buff | 17 | 17 | 0 | 11 | 6 |
| 92.3% | Hard map | Meds Up | 39 | 36 | 3 | 13 | 23 |
| 93.1% | Normal map | No Meds Buff | 130 | 121 | 9 | 64 | 57 |
| 92.7% | Normal map | Meds Up | 164 | 152 | 12 | 72 | 80 |
Team Tips
- Spread Psychic damage across clustered defenders before using Toth’s active to collect extra shots.
- Manually fire Z’Kar’s free Infernal Cannon after targets take Psychic damage or are on fire; only the selected hex is ignited.
- Build fire coverage for Ahriman’s damage bonuses and additional active hits.
- Consider saving a wounded enemy for Ahriman’s normal ranged kill to refresh his used active.
03Double Howl
Core team
 Ragnar
  Aun'Shi
 - Clear rate
- 88.3%1,941 / 2,199clears / attempts
- Perfect share of wins
- 51.7%1,004 / 1,941Perfect clears / clears
- Meds Up clear rate
- 87.1%1,273 / 1,462Meds Up clears / attempts
- Perfect share of Meds Up wins
- 49.6%632 / 1,273Perfect Meds Up clears / Meds Up clears
Popular flex options
-
 Khârn 55.3%1,215 attacks
 -
 Kariyan 45.7%1,004 attacks
 -
 Bellator 26.1%575 attacks
 -
 Celestine 18.1%397 attacks
 -
 Dante 12.2%269 attacks
Machines of War
- No MoW deployed 27.6%607 attacks
- Biovore 21.1%463 attacks
Heroes exactly
Top 5 of 717 observed combinations.
Scroll across to see all results.
| Full team (core + flex) | Attempts | Usage | Clears | Clear rate | Perfects | Failures |
|---|---|---|---|---|---|---|
| Ragnar Aun'Shi Celestine Kariyan Khârn | 89 | 4.0% | 87 | 97.8% | 52 | 2 |
| Ragnar Aun'Shi Dante Kariyan Khârn | 89 | 4.0% | 82 | 92.1% | 38 | 7 |
| Ragnar Aun'Shi Kariyan Bellator Khârn | 83 | 3.8% | 79 | 95.2% | 37 | 4 |
Ragnar Aun'Shi Kariyan  Aethana Khârn Aethana Khârn | 65 | 3.0% | 62 | 95.4% | 29 | 3 |
Ragnar Aun'Shi Kariyan  Trajann Khârn Trajann Khârn | 61 | 2.8% | 57 | 93.4% | 26 | 4 |
Complete Team exactly
Top 5 of 1,254 observed combinations.
Scroll across to see all results.
| Full team (core + flex) | Machine of War | Attempts | Usage | Clears | Clear rate | Perfects | Failures |
|---|---|---|---|---|---|---|---|
| Ragnar Aun'Shi Celestine Kariyan Khârn | No MoW deployed | 34 | 1.5% | 33 | 97.1% | 26 | 1 |
| Ragnar Aun'Shi Kariyan Bellator Khârn | No MoW deployed | 32 | 1.5% | 30 | 93.8% | 15 | 2 |
| Ragnar Aun'Shi Dante Kariyan Khârn | Biovore | 29 | 1.3% | 29 | 100.0% | 15 | 0 |
| Ragnar Aun'Shi Kariyan Aethana Khârn | No MoW deployed | 24 | 1.1% | 22 | 91.7% | 11 | 2 |
| Ragnar Aun'Shi Dante Kariyan Khârn | No MoW deployed | 22 | 1.0% | 21 | 95.5% | 9 | 1 |
Hard Maps
| Clear rate | Map | Medicae | Attempts | Clears | Failures | Perfects | Clears with deaths |
|---|---|---|---|---|---|---|---|
| 87.1% | Hard map | No Meds Buff | 116 | 101 | 15 | 58 | 43 |
| 84.6% | Hard map | Meds Up | 280 | 237 | 43 | 105 | 132 |
| 91.3% | Normal map | No Meds Buff | 621 | 567 | 54 | 314 | 253 |
| 87.6% | Normal map | Meds Up | 1,182 | 1,036 | 146 | 527 | 509 |
Team Tips
- Before moving Ragnar: howl, reset him with Aun’Shi, then howl again.
- Spend the buffs on normal melee attacks from eligible characters without a normal ranged attack; Khârn’s active does not qualify.
- Keep Aun’Shi’s reset level high enough; it limits the strength of the second howl.
- Check that several attackers can reach useful targets before committing. Unstoppable does not bypass Overwatch.
Community discussion: Using Double Howl correctly.
04Imperials
Core team
Celestine  Isabella Dreir Yarrick
 - Clear rate
- 87.4%326 / 373clears / attempts
- Perfect share of wins
- 65.6%214 / 326Perfect clears / clears
- Meds Up clear rate
- 81.5%176 / 216Meds Up clears / attempts
- Perfect share of Meds Up wins
- 65.3%115 / 176Perfect Meds Up clears / Meds Up clears
Popular flex options
-
 Vindicta 34.0%127 attacks
 -
 Creed 30.8%115 attacks
 -
 Thaddeus 5.4%20 attacks
 -
 Roswitha 4.3%16 attacks
 -
 Sarquael 4.0%15 attacks
Machines of War
- Malleus Rocket Launcher 66.5%248 attacks
-
 Exorcist 18.8%70 attacks
Heroes exactly
Top 5 of 34 observed combinations.
Scroll across to see all results.
| Full team (core + flex) | Attempts | Usage | Clears | Clear rate | Perfects | Failures |
|---|---|---|---|---|---|---|
| Celestine Isabella Dreir Yarrick Vindicta | 127 | 34.0% | 114 | 89.8% | 75 | 13 |
| Celestine Isabella Dreir Yarrick Creed | 115 | 30.8% | 101 | 87.8% | 70 | 14 |
| Celestine Isabella Dreir Yarrick Thaddeus | 20 | 5.4% | 16 | 80.0% | 11 | 4 |
| Celestine Isabella Dreir Yarrick Roswitha | 16 | 4.3% | 13 | 81.3% | 8 | 3 |
| Celestine Isabella Dreir Yarrick Sarquael | 15 | 4.0% | 14 | 93.3% | 8 | 1 |
Complete Team exactly
Top 5 of 72 observed combinations.
Scroll across to see all results.
| Full team (core + flex) | Machine of War | Attempts | Usage | Clears | Clear rate | Perfects | Failures |
|---|---|---|---|---|---|---|---|
| Celestine Isabella Dreir Yarrick Creed | Malleus Rocket Launcher | 92 | 24.7% | 83 | 90.2% | 59 | 9 |
| Celestine Isabella Dreir Yarrick Vindicta | Malleus Rocket Launcher | 75 | 20.1% | 71 | 94.7% | 49 | 4 |
| Celestine Isabella Dreir Yarrick Vindicta | Exorcist | 37 | 9.9% | 30 | 81.1% | 16 | 7 |
| Celestine Isabella Dreir Yarrick Thaddeus | Malleus Rocket Launcher | 15 | 4.0% | 12 | 80.0% | 9 | 3 |
Celestine Isabella Dreir Yarrick  Godswyl Godswyl | Malleus Rocket Launcher | 12 | 3.2% | 12 | 100.0% | 11 | 0 |
Hard Maps
| Clear rate | Map | Medicae | Attempts | Clears | Failures | Perfects | Clears with deaths |
|---|---|---|---|---|---|---|---|
| 100.0% | Hard map | No Meds Buff | 25 | 25 | 0 | 14 | 11 |
| 81.3% | Hard map | Meds Up | 32 | 26 | 6 | 18 | 8 |
| 94.7% | Normal map | No Meds Buff | 132 | 125 | 7 | 85 | 40 |
| 81.5% | Normal map | Meds Up | 184 | 150 | 34 | 97 | 53 |
Team Tips
- Keep the support group together around Isabella; her resurrection only covers eligible non-Mechanical Imperial units.
- If time allows, use expendable Guardsmen to build Yarrick’s summon count. Do not delay a needed attack chasing maximum bodies.
- Keep charge lanes open for Dreir’s riders before crowding the board with summons.
- Plan Celestine’s advance alongside the team’s follow-up so her target does not leave the support group exposed.
Community discussion: Dreir, Isabella and Imperial summon teams.
05Blood Angels
Core team
 Mephiston Dante
  Mataneo
  Nicodemus
  Lucien
 - Clear rate
- 87.0%1,839 / 2,115clears / attempts
- Perfect share of wins
- 53.4%982 / 1,839Perfect clears / clears
- Meds Up clear rate
- 84.1%1,134 / 1,348Meds Up clears / attempts
- Perfect share of Meds Up wins
- 48.3%548 / 1,134Perfect Meds Up clears / Meds Up clears
Popular flex options
Uses at least four of these five core heroes. Usage is out of 2,930 distinct attacks, including 2,115 with all five and 815 with a replacement. Each attack counts once.
-
 Cezare 8.1%236 attacks
Machines of War
- No MoW deployed 20.5%433 attacks
- Malleus Rocket Launcher 14.1%299 attacks
- Exorcist 12.2%259 attacks
The main metrics, Machines of War, and the next three tables use all five core heroes. Four-of-five flex results follow separately.
Heroes exactly
1 observed combinations.
Scroll across to see all results.
| Full team (core + flex) | Attempts | Usage | Clears | Clear rate | Perfects | Failures |
|---|---|---|---|---|---|---|
| Mephiston Dante Mataneo Nicodemus Lucien | 2,115 | 100.0% | 1,839 | 87.0% | 982 | 276 |
Complete Team exactly
Top 5 of 12 observed combinations.
Scroll across to see all results.
| Full team (core + flex) | Machine of War | Attempts | Usage | Clears | Clear rate | Perfects | Failures |
|---|---|---|---|---|---|---|---|
| Mephiston Dante Mataneo Nicodemus Lucien | No MoW deployed | 433 | 20.5% | 366 | 84.5% | 206 | 67 |
| Mephiston Dante Mataneo Nicodemus Lucien | Malleus Rocket Launcher | 299 | 14.1% | 268 | 89.6% | 119 | 31 |
| Mephiston Dante Mataneo Nicodemus Lucien | Exorcist | 259 | 12.2% | 224 | 86.5% | 121 | 35 |
| Mephiston Dante Mataneo Nicodemus Lucien | Biovore | 215 | 10.2% | 195 | 90.7% | 108 | 20 |
| Mephiston Dante Mataneo Nicodemus Lucien | Forgefiend | 192 | 9.1% | 161 | 83.9% | 88 | 31 |
Hard Maps
| Clear rate | Map | Medicae | Attempts | Clears | Failures | Perfects | Clears with deaths |
|---|---|---|---|---|---|---|---|
| 87.6% | Hard map | No Meds Buff | 145 | 127 | 18 | 74 | 53 |
| 77.5% | Hard map | Meds Up | 222 | 172 | 50 | 67 | 105 |
| 92.9% | Normal map | No Meds Buff | 622 | 578 | 44 | 360 | 218 |
| 85.4% | Normal map | Meds Up | 1,126 | 962 | 164 | 481 | 481 |
Flex combinations — any four of five
2,510 / 2,930 clears (85.7%), including 420 failures. Usage below divides by these 2,930 distinct attacks. Each lineup shows the core hero it replaces; the full core appears once.
Top 5 of 179 observed combinations.
Scroll across to see all results.
| Full team (core + flex) | Attempts | Usage | Clears | Clear rate | Perfects | Failures |
|---|---|---|---|---|---|---|
| Mephiston Dante Mataneo Nicodemus Lucien All five core heroes | 2,115 | 72.2% | 1,839 | 87.0% | 982 | 276 |
| Mephiston Dante Mataneo Nicodemus Cezare Replaces Lucien | 95 | 3.2% | 84 | 88.4% | 47 | 11 |
| Mephiston Mataneo Nicodemus Lucien Cezare Replaces Dante | 47 | 1.6% | 37 | 78.7% | 16 | 10 |
| Mephiston Dante Nicodemus Lucien Cezare Replaces Mataneo | 39 | 1.3% | 25 | 64.1% | 7 | 14 |
| Mephiston Dante Mataneo Lucien Cezare Replaces Nicodemus | 31 | 1.1% | 25 | 80.6% | 16 | 6 |
Flex team and Machine of War
Top 5 of 449 observed combinations.
Scroll across to see all results.
| Full team (core + flex) | Machine of War | Attempts | Usage | Clears | Clear rate | Perfects | Failures |
|---|---|---|---|---|---|---|---|
| Mephiston Dante Mataneo Nicodemus Lucien All five core heroes | No MoW deployed | 433 | 14.8% | 366 | 84.5% | 206 | 67 |
| Mephiston Dante Mataneo Nicodemus Lucien All five core heroes | Malleus Rocket Launcher | 299 | 10.2% | 268 | 89.6% | 119 | 31 |
| Mephiston Dante Mataneo Nicodemus Lucien All five core heroes | Exorcist | 259 | 8.8% | 224 | 86.5% | 121 | 35 |
| Mephiston Dante Mataneo Nicodemus Lucien All five core heroes | Biovore | 215 | 7.3% | 195 | 90.7% | 108 | 20 |
| Mephiston Dante Mataneo Nicodemus Lucien All five core heroes | Forgefiend | 192 | 6.6% | 161 | 83.9% | 88 | 31 |
Machines of War with four-of-five teams
- No MoW deployed 19.0%558 attacks
- Malleus Rocket Launcher 14.5%426 attacks
- Exorcist 11.6%339 attacks
Perfect share of wins: 1,289 / 2,510 (51.4%). Meds Up clear rate: 1,530 / 1,854 (82.5%). Perfect share of Meds Up wins: 714 / 1,530 (46.7%).
| Clear rate | Map | Medicae | Attempts | Clears | Failures | Perfects | Clears with deaths |
|---|---|---|---|---|---|---|---|
| 86.3% | Hard map | No Meds Buff | 212 | 183 | 29 | 101 | 82 |
| 74.7% | Hard map | Meds Up | 320 | 239 | 81 | 89 | 150 |
| 92.2% | Normal map | No Meds Buff | 864 | 797 | 67 | 474 | 323 |
| 84.2% | Normal map | Meds Up | 1,534 | 1,291 | 243 | 625 | 666 |
Team Tips
- Move Nicodemus before using his active for the low-health burst setup; later movement can undo the intended health timing.
- Check Nicodemus’s buff range before sending attackers forward.
- Keep Mephiston and other eligible attackers covered by Dante’s aura when they attack.
- With Lucien in the core, plan his attack around Nicodemus’s melee piercing support.
Community discussions: Nicodemus and Lucien, Nicodemus timing corrections, Dante–Mephiston synergy.
06Tau Team
Core team
 Re'vas
  Farsight
  Shadowsun
 - Clear rate
- 86.7%461 / 532clears / attempts
- Perfect share of wins
- 65.3%301 / 461Perfect clears / clears
- Meds Up clear rate
- 84.1%280 / 333Meds Up clears / attempts
- Perfect share of Meds Up wins
- 62.5%175 / 280Perfect Meds Up clears / Meds Up clears
Popular flex options
-
 Sho'syl 60.3%321 attacks
 -
 Darkstrider 45.1%240 attacks
 - Aun'Shi 18.4%98 attacks
-
 Calgar 15.0%80 attacks
 - Aethana 8.5%45 attacks
Machines of War
- Tson'ji 66.4%353 attacks
- No MoW deployed 11.5%61 attacks
Heroes exactly
Top 5 of 111 observed combinations.
Scroll across to see all results.
| Full team (core + flex) | Attempts | Usage | Clears | Clear rate | Perfects | Failures |
|---|---|---|---|---|---|---|
| Re'vas Farsight Shadowsun Darkstrider Sho'syl | 171 | 32.1% | 152 | 88.9% | 106 | 19 |
| Re'vas Farsight Shadowsun Aun'Shi Sho'syl | 47 | 8.8% | 39 | 83.0% | 28 | 8 |
| Re'vas Farsight Shadowsun Aun'Shi Darkstrider | 25 | 4.7% | 20 | 80.0% | 15 | 5 |
| Re'vas Farsight Shadowsun Sho'syl Calgar | 19 | 3.6% | 18 | 94.7% | 14 | 1 |
Re'vas Farsight Shadowsun  Aleph-Null Sho'syl Aleph-Null Sho'syl | 19 | 3.6% | 16 | 84.2% | 6 | 3 |
Complete Team exactly
Top 5 of 176 observed combinations.
Scroll across to see all results.
| Full team (core + flex) | Machine of War | Attempts | Usage | Clears | Clear rate | Perfects | Failures |
|---|---|---|---|---|---|---|---|
| Re'vas Farsight Shadowsun Darkstrider Sho'syl | Tson'ji | 144 | 27.1% | 127 | 88.2% | 88 | 17 |
| Re'vas Farsight Shadowsun Aun'Shi Sho'syl | Tson'ji | 39 | 7.3% | 32 | 82.1% | 23 | 7 |
| Re'vas Farsight Shadowsun Aun'Shi Darkstrider | Tson'ji | 21 | 3.9% | 16 | 76.2% | 12 | 5 |
| Re'vas Farsight Shadowsun Thaddeus Sho'syl | Tson'ji | 19 | 3.6% | 15 | 78.9% | 12 | 4 |
Re'vas Farsight Shadowsun Sarquael  Calandis Calandis |  Storm Speeder Storm Speeder | 15 | 2.8% | 15 | 100.0% | 6 | 0 |
Hard Maps
| Clear rate | Map | Medicae | Attempts | Clears | Failures | Perfects | Clears with deaths |
|---|---|---|---|---|---|---|---|
| 100.0% | Hard map | No Meds Buff | 40 | 40 | 0 | 29 | 11 |
| 84.3% | Hard map | Meds Up | 70 | 59 | 11 | 38 | 21 |
| 88.7% | Normal map | No Meds Buff | 159 | 141 | 18 | 97 | 44 |
| 84.0% | Normal map | Meds Up | 263 | 221 | 42 | 137 | 84 |
Team Tips
- Place Re’vas where approaching enemies must cross her Overwatch; use high ground when available.
- Keep shooters within Farsight’s and Shadowsun’s support ranges. Engage their targets with a friendly unit for Farsight’s ranged bonus.
- With Sho’syl or Darkstrider, arrange Markerlight support before Re’vas’s attack window.
- Check suppression threats and Meds Up durability; Arena-style Overwatch wipes are not guaranteed in Guild War.
Community discussion: Re’vas positioning, support and Guild War limitations.
07Yaz Abrax
Core team
Abraxas Yazaghor Archimatos - Clear rate
- 83.9%2,226 / 2,654clears / attempts
- Perfect share of wins
- 48.4%1,077 / 2,226Perfect clears / clears
- Meds Up clear rate
- 80.3%1,369 / 1,705Meds Up clears / attempts
- Perfect share of Meds Up wins
- 44.3%606 / 1,369Perfect Meds Up clears / Meds Up clears
Popular flex options
- Ahriman 51.6%1,369 attacks
- Neurothrope 33.3%885 attacks
-
 Eldryon 28.8%764 attacks
 - Toth 12.4%330 attacks
- Mephiston 11.2%298 attacks
Machines of War
- Z'kar 61.3%1,627 attacks
- Forgefiend 15.8%419 attacks
Heroes exactly
Top 5 of 398 observed combinations.
Scroll across to see all results.
| Full team (core + flex) | Attempts | Usage | Clears | Clear rate | Perfects | Failures |
|---|---|---|---|---|---|---|
| Abraxas Yazaghor Archimatos Ahriman Neurothrope | 497 | 18.7% | 434 | 87.3% | 218 | 63 |
| Abraxas Yazaghor Archimatos Eldryon Ahriman | 283 | 10.7% | 252 | 89.0% | 117 | 31 |
| Abraxas Yazaghor Archimatos Eldryon Neurothrope | 160 | 6.0% | 139 | 86.9% | 70 | 21 |
| Abraxas Yazaghor Archimatos Mephiston Ahriman | 97 | 3.7% | 88 | 90.7% | 41 | 9 |
| Abraxas Yazaghor Archimatos Ahriman Toth | 91 | 3.4% | 76 | 83.5% | 45 | 15 |
Complete Team exactly
Top 5 of 677 observed combinations.
Scroll across to see all results.
| Full team (core + flex) | Machine of War | Attempts | Usage | Clears | Clear rate | Perfects | Failures |
|---|---|---|---|---|---|---|---|
| Abraxas Yazaghor Archimatos Ahriman Neurothrope | Z'kar | 302 | 11.4% | 268 | 88.7% | 135 | 34 |
| Abraxas Yazaghor Archimatos Eldryon Ahriman | Z'kar | 167 | 6.3% | 146 | 87.4% | 69 | 21 |
| Abraxas Yazaghor Archimatos Ahriman Neurothrope | Forgefiend | 133 | 5.0% | 117 | 88.0% | 59 | 16 |
| Abraxas Yazaghor Archimatos Eldryon Neurothrope | Z'kar | 101 | 3.8% | 87 | 86.1% | 42 | 14 |
| Abraxas Yazaghor Archimatos Mephiston Ahriman | Z'kar | 76 | 2.9% | 68 | 89.5% | 32 | 8 |
Hard Maps
| Clear rate | Map | Medicae | Attempts | Clears | Failures | Perfects | Clears with deaths |
|---|---|---|---|---|---|---|---|
| 87.5% | Hard map | No Meds Buff | 120 | 105 | 15 | 52 | 53 |
| 79.0% | Hard map | Meds Up | 252 | 199 | 53 | 89 | 110 |
| 90.7% | Normal map | No Meds Buff | 829 | 752 | 77 | 419 | 333 |
| 80.5% | Normal map | Meds Up | 1,453 | 1,170 | 283 | 517 | 653 |
Team Tips
- Start Abraxas’s active and let the initial summon chain resolve before swapping him with Yazaghor.
- Swap into free summon space with reachable enemies; moving farther forward alone does not help.
- Save Archimatos’s Psychic action—or another fresh Psychic hit—to restart the chain after the swap.
- Yazaghor deals his damage before swapping; that hit cannot restart the chain at Abraxas’s new position.
Community discussion: Abraxas–Yazaghor sequence troubleshooting.
08WAAAGH
Core team
 Gulgortz
  Snotflogga
  Tanksmasha
 - Clear rate
- 83.4%1,386 / 1,661clears / attempts
- Perfect share of wins
- 53.8%746 / 1,386Perfect clears / clears
- Meds Up clear rate
- 81.1%879 / 1,084Meds Up clears / attempts
- Perfect share of Meds Up wins
- 49.7%437 / 879Perfect Meds Up clears / Meds Up clears
Popular flex options
-
 Gibbascrapz 73.7%1,224 attacks
 -
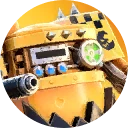 Snappawrecka 61.7%1,025 attacks
 -
 Helbrecht 11.4%190 attacks
 -
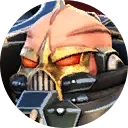 Haarken 6.1%102 attacks
 - Calandis 4.6%77 attacks
Machines of War
-
 Rukkatrukk 70.4%1,169 attacks
Heroes exactly
Top 5 of 269 observed combinations.
Scroll across to see all results.
| Full team (core + flex) | Attempts | Usage | Clears | Clear rate | Perfects | Failures |
|---|---|---|---|---|---|---|
| Gulgortz Snotflogga Tanksmasha Gibbascrapz Snappawrecka | 960 | 57.8% | 766 | 79.8% | 406 | 194 |
| Gulgortz Snotflogga Tanksmasha Gibbascrapz Helbrecht | 43 | 2.6% | 41 | 95.3% | 25 | 2 |
| Gulgortz Snotflogga Tanksmasha Haarken Gibbascrapz | 43 | 2.6% | 38 | 88.4% | 25 | 5 |
| Gulgortz Snotflogga Tanksmasha Haarken Helbrecht | 30 | 1.8% | 28 | 93.3% | 16 | 2 |
| Gulgortz Snotflogga Tanksmasha Calandis Gibbascrapz | 29 | 1.7% | 28 | 96.6% | 11 | 1 |
Complete Team exactly
Top 5 of 395 observed combinations.
Scroll across to see all results.
| Full team (core + flex) | Machine of War | Attempts | Usage | Clears | Clear rate | Perfects | Failures |
|---|---|---|---|---|---|---|---|
| Gulgortz Snotflogga Tanksmasha Gibbascrapz Snappawrecka | Rukkatrukk | 773 | 46.5% | 614 | 79.4% | 324 | 159 |
| Gulgortz Snotflogga Tanksmasha Gibbascrapz Snappawrecka | No MoW deployed | 64 | 3.9% | 49 | 76.6% | 23 | 15 |
| Gulgortz Snotflogga Tanksmasha Gibbascrapz Snappawrecka | Forgefiend | 38 | 2.3% | 35 | 92.1% | 22 | 3 |
| Gulgortz Snotflogga Tanksmasha Calandis Gibbascrapz | Rukkatrukk | 25 | 1.5% | 24 | 96.0% | 10 | 1 |
| Gulgortz Snotflogga Tanksmasha Gibbascrapz Helbrecht | Rukkatrukk | 25 | 1.5% | 23 | 92.0% | 14 | 2 |
Hard Maps
| Clear rate | Map | Medicae | Attempts | Clears | Failures | Perfects | Clears with deaths |
|---|---|---|---|---|---|---|---|
| 80.0% | Hard map | No Meds Buff | 95 | 76 | 19 | 30 | 46 |
| 67.7% | Hard map | Meds Up | 161 | 109 | 52 | 41 | 68 |
| 89.4% | Normal map | No Meds Buff | 482 | 431 | 51 | 279 | 152 |
| 83.4% | Normal map | Meds Up | 923 | 770 | 153 | 396 | 374 |
Team Tips
- Use WAAAGH before moving Gulgortz when you want extra Boyz; leave adjacent summon hexes open.
- Check fire, wire and overlapping Overwatch before committing the charge.
- Use Tanksmasha’s suppression where available before follow-up attackers cross an Overwatch lane.
- Avoid spending the whole charge on a durable bait target while dangerous defenders remain behind it.
Community discussion: Gulgortz counterplay: bait, terrain and Overwatch.
09Death Guard
Core team
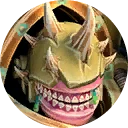 Maladus
 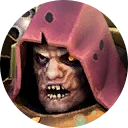 Rotbone
 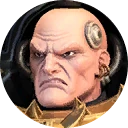 Abaddon
 - Clear rate
- 83.1%1,513 / 1,821clears / attempts
- Perfect share of wins
- 46.9%709 / 1,513Perfect clears / clears
- Meds Up clear rate
- 78.0%814 / 1,043Meds Up clears / attempts
- Perfect share of Meds Up wins
- 47.9%390 / 814Perfect Meds Up clears / Meds Up clears
Popular flex options
- Volk 35.9%653 attacks
-
 Corrodius 22.0%401 attacks
 - Typhus 21.3%388 attacks
- Lucius 17.7%322 attacks
- Sho'syl 15.3%278 attacks
Machines of War
-
 Foetid Bloat-Drone 68.8%1,252 attacks
 - Forgefiend 10.4%189 attacks
Heroes exactly
Top 5 of 310 observed combinations.
Scroll across to see all results.
| Full team (core + flex) | Attempts | Usage | Clears | Clear rate | Perfects | Failures |
|---|---|---|---|---|---|---|
| Maladus Rotbone Abaddon Volk Lucius | 135 | 7.4% | 122 | 90.4% | 73 | 13 |
| Maladus Rotbone Abaddon Volk Typhus | 130 | 7.1% | 115 | 88.5% | 58 | 15 |
| Maladus Rotbone Abaddon Volk Corrodius | 104 | 5.7% | 90 | 86.5% | 52 | 14 |
Maladus Rotbone Abaddon Volk  Shiron Shiron | 74 | 4.1% | 67 | 90.5% | 38 | 7 |
| Maladus Rotbone Abaddon Corrodius Typhus | 58 | 3.2% | 40 | 69.0% | 15 | 18 |
Complete Team exactly
Top 5 of 561 observed combinations.
Scroll across to see all results.
| Full team (core + flex) | Machine of War | Attempts | Usage | Clears | Clear rate | Perfects | Failures |
|---|---|---|---|---|---|---|---|
| Maladus Rotbone Abaddon Volk Lucius | Foetid Bloat-Drone | 106 | 5.8% | 94 | 88.7% | 57 | 12 |
| Maladus Rotbone Abaddon Volk Typhus | Foetid Bloat-Drone | 98 | 5.4% | 86 | 87.8% | 44 | 12 |
| Maladus Rotbone Abaddon Volk Corrodius | Foetid Bloat-Drone | 86 | 4.7% | 75 | 87.2% | 44 | 11 |
| Maladus Rotbone Abaddon Volk Shiron | Foetid Bloat-Drone | 54 | 3.0% | 50 | 92.6% | 27 | 4 |
| Maladus Rotbone Abaddon Corrodius Typhus | Foetid Bloat-Drone | 46 | 2.5% | 31 | 67.4% | 13 | 15 |
Hard Maps
| Clear rate | Map | Medicae | Attempts | Clears | Failures | Perfects | Clears with deaths |
|---|---|---|---|---|---|---|---|
| 86.1% | Hard map | No Meds Buff | 158 | 136 | 22 | 60 | 76 |
| 73.2% | Hard map | Meds Up | 231 | 169 | 62 | 81 | 88 |
| 90.8% | Normal map | No Meds Buff | 620 | 563 | 57 | 259 | 304 |
| 79.4% | Normal map | Meds Up | 812 | 645 | 167 | 309 | 336 |
Team Tips
- Keep vulnerable Chaos allies adjacent to Rotbone; his rescue is chance-based, not guaranteed.
- Advance together. Check whether fire or a retreating target could split the slow formation.
- Save Maladus’s active for a decisive kill against Rotbone-supported enemies; Always Overkilled prevents their usual recovery.
- Set up Maladus’s passive chain by choosing a victim beside another enemy that is also adjacent to Maladus.
Community discussion: Rotbone, Maladus and formation weaknesses.
10AdMech
Core team
 Exitor-Rho
  Tan Gi'da
 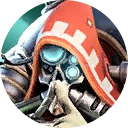 Actus
Actus - Clear rate
- 77.1%2,764 / 3,587clears / attempts
- Perfect share of wins
- 43.1%1,192 / 2,764Perfect clears / clears
- Meds Up clear rate
- 72.0%1,486 / 2,063Meds Up clears / attempts
- Perfect share of Meds Up wins
- 39.4%586 / 1,486Perfect Meds Up clears / Meds Up clears
Popular flex options
-
 Vitruvius 57.0%2,045 attacks
 - Aleph-Null 38.3%1,373 attacks
- Sho'syl 30.2%1,085 attacks
- Gulgortz 13.2%472 attacks
-
 Sy-gex 12.5%450 attacks
Machines of War
-
 Galatian 50.1%1,796 attacks
 -
 Reanimator 15.9%570 attacks
Heroes exactly
Top 5 of 297 observed combinations.
Scroll across to see all results.
| Full team (core + flex) | Attempts | Usage | Clears | Clear rate | Perfects | Failures |
|---|---|---|---|---|---|---|
| Exitor-Rho Tan Gi'da Actus Vitruvius Aleph-Null | 545 | 15.2% | 434 | 79.6% | 190 | 111 |
| Exitor-Rho Tan Gi'da Actus Vitruvius Sho'syl | 473 | 13.2% | 359 | 75.9% | 119 | 114 |
| Exitor-Rho Tan Gi'da Actus Aleph-Null Sho'syl | 307 | 8.6% | 261 | 85.0% | 110 | 46 |
| Exitor-Rho Tan Gi'da Actus Vitruvius Gulgortz | 275 | 7.7% | 222 | 80.7% | 104 | 53 |
| Exitor-Rho Tan Gi'da Actus Sy-gex Vitruvius | 261 | 7.3% | 179 | 68.6% | 71 | 82 |
Complete Team exactly
Top 5 of 682 observed combinations.
Scroll across to see all results.
| Full team (core + flex) | Machine of War | Attempts | Usage | Clears | Clear rate | Perfects | Failures |
|---|---|---|---|---|---|---|---|
| Exitor-Rho Tan Gi'da Actus Vitruvius Aleph-Null | Galatian | 355 | 9.9% | 292 | 82.3% | 120 | 63 |
| Exitor-Rho Tan Gi'da Actus Vitruvius Sho'syl | Galatian | 281 | 7.8% | 223 | 79.4% | 78 | 58 |
| Exitor-Rho Tan Gi'da Actus Aleph-Null Sho'syl | Galatian | 174 | 4.9% | 152 | 87.4% | 57 | 22 |
| Exitor-Rho Tan Gi'da Actus Vitruvius Gulgortz | Galatian | 147 | 4.1% | 116 | 78.9% | 54 | 31 |
| Exitor-Rho Tan Gi'da Actus Sy-gex Vitruvius | Galatian | 130 | 3.6% | 90 | 69.2% | 39 | 40 |
Hard Maps
| Clear rate | Map | Medicae | Attempts | Clears | Failures | Perfects | Clears with deaths |
|---|---|---|---|---|---|---|---|
| 81.5% | Hard map | No Meds Buff | 233 | 190 | 43 | 79 | 111 |
| 65.5% | Hard map | Meds Up | 325 | 213 | 112 | 71 | 142 |
| 84.3% | Normal map | No Meds Buff | 1,291 | 1,088 | 203 | 527 | 561 |
| 73.2% | Normal map | Meds Up | 1,738 | 1,273 | 465 | 515 | 758 |
Team Tips
- Put Exitor-Rho beside the target before other Mechanical units attack it, triggering his follow-up damage.
- Leave an adjacent hex open for Tan Gi’da’s next Skitarii while building summons in Protector mode.
- Use Actus’s repair on an eligible unit with a useful target in range to generate another attack.
- Rho’s Infiltrate helps him approach Overwatch; check the kill and follow-up routes before exposing the rest of the team.
Community discussions: Rho versus Re’vas, AdMech attack-chain tips.
More to Explore

Beginner Guide
New player priorities and Normal Campaign progression.

Elite Campaigns
Elite Campaign minimum investment guide.
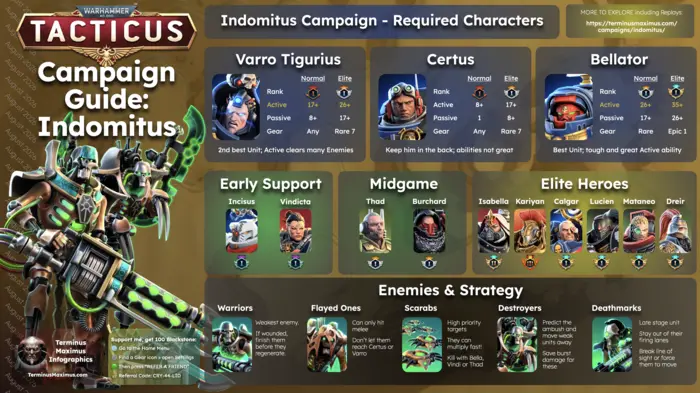
Indomitus Campaign Guide

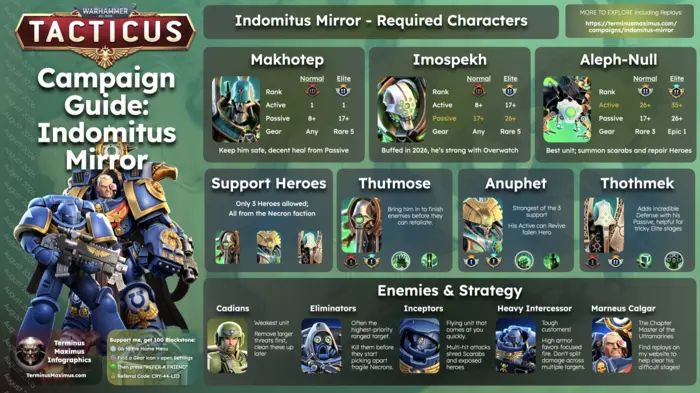
Indomitus Mirror Guide



Explore All Campaign Guides
Indomitus, Fall of Cadia, Octarius, and Saim-Hann. Normal, Elite, and Mirror.
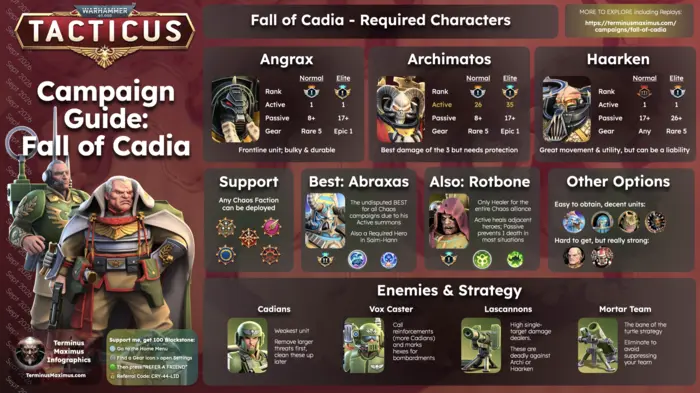
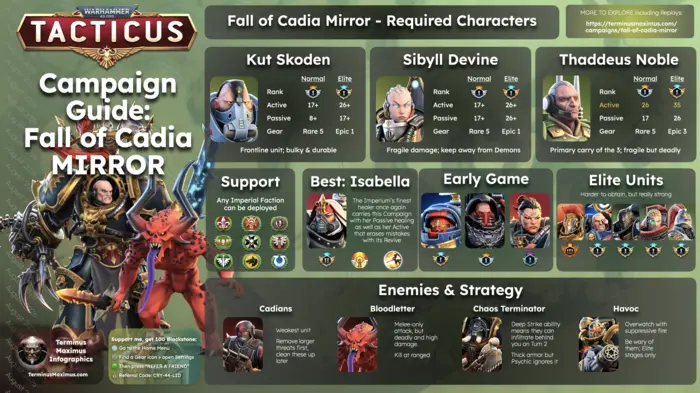
Fall of Cadia Campaign Guide
Fall of Cadia Mirror Guide
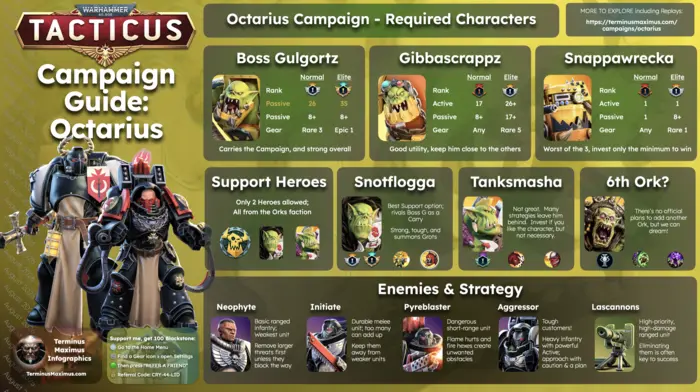
Octarius Campaign Guide
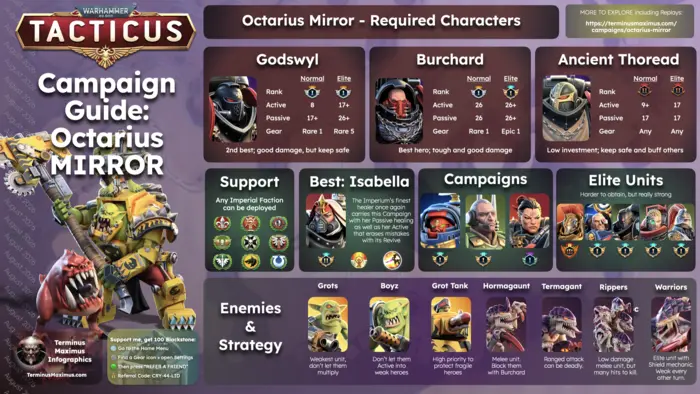
Octarius Mirror Guide
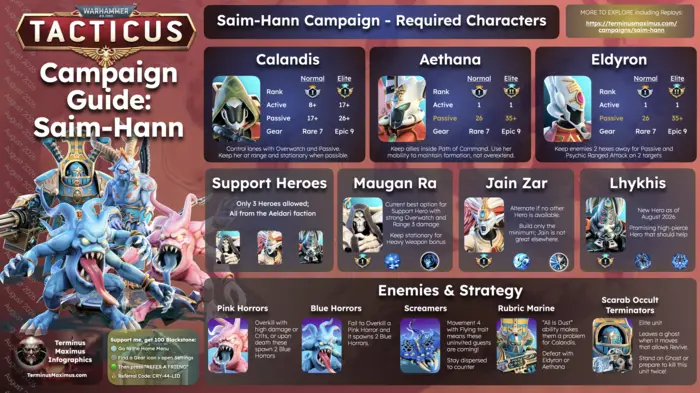
Saim-Hann Campaign Guide
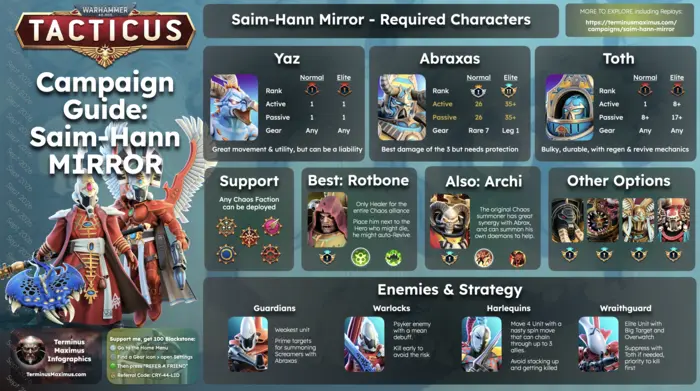
Saim-Hann Mirror Guide
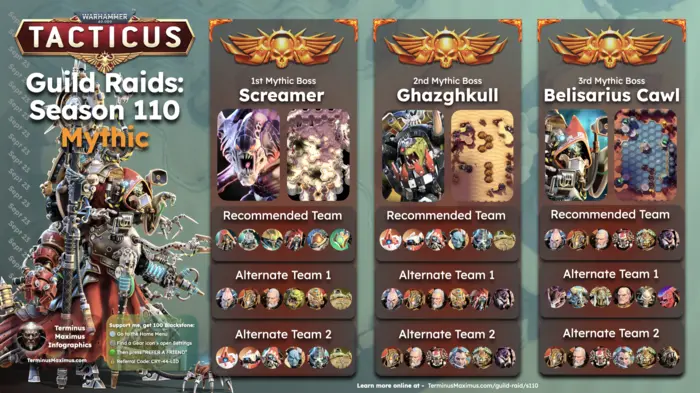
Current Season
Current Guild Raid season infographics, boss lineups, and team guidance.
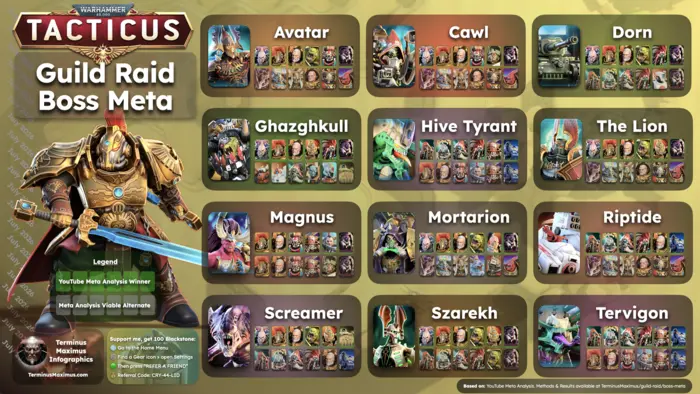
Boss Meta Guide
Meta and alternate teams for every Guild Raid boss, backed by replay research.
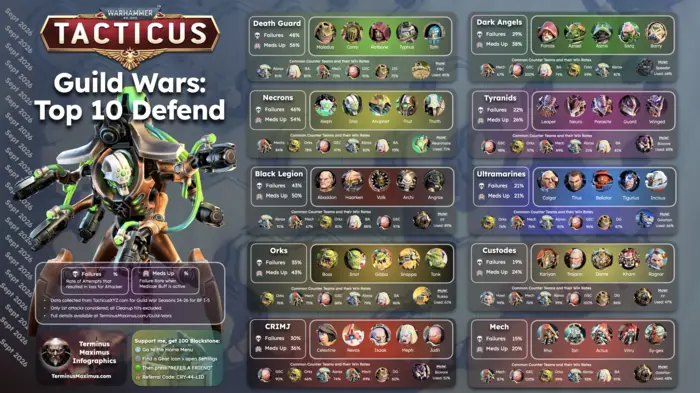
Guild War Top 10 Defend Teams
Guild War Top 10 Defend Teams and their most common counters

Replay Library
Web exclusive feature! Search replays by Boss, Map, Team, or even specific Heroes
Guild Raid Archive
Browse past Guild Raid seasons and infographic archives.
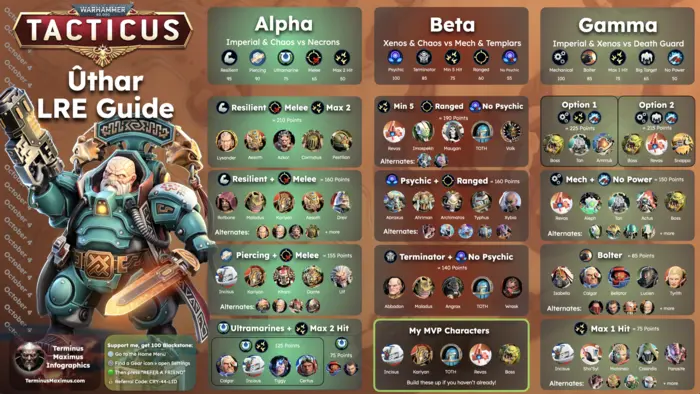
Uthar LRE
Be ready for the Votann Legendary on Oct 4
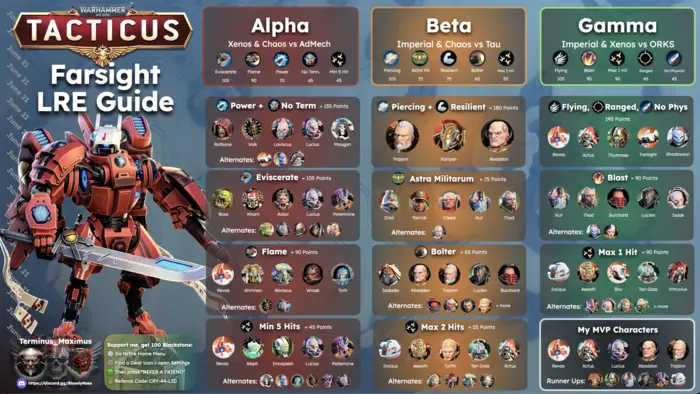
Farsight LRE
Be ready for the Tau Legendary on either Nov 8 or Dec 13
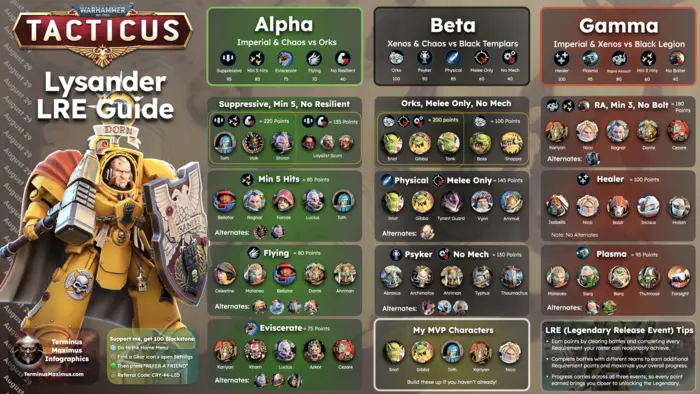
Lysander LRE
Be ready for the First Captain on either Dec 13 or Jan 17
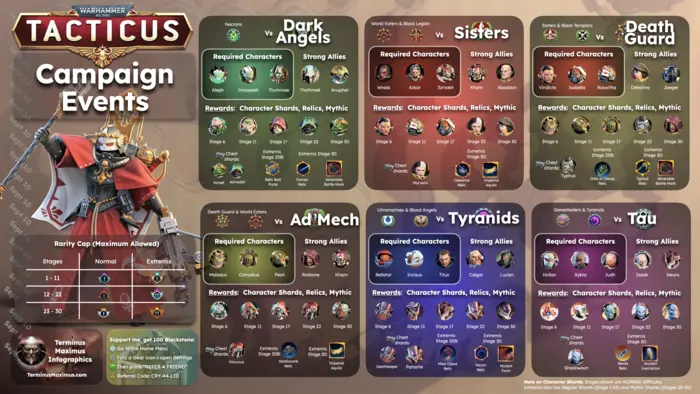
Campaign Event
Next CE begins Sept 10
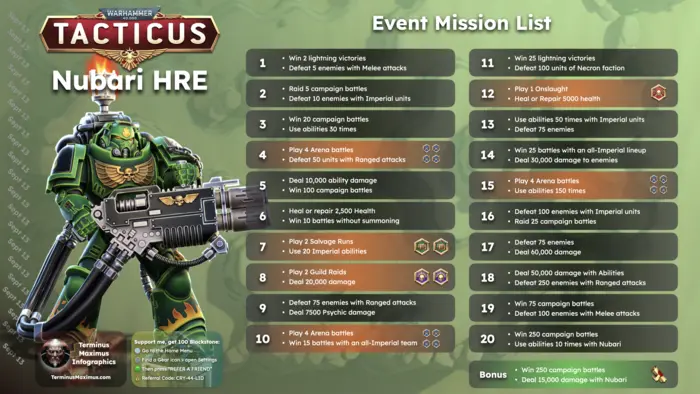
Hero Release Events
Next HRE begins Sept 13
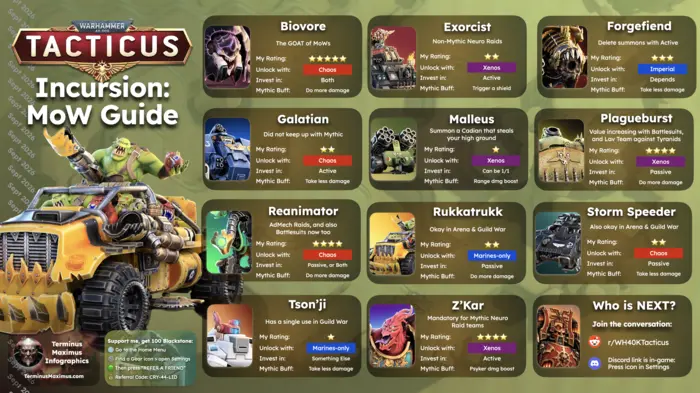
Incursion / MoW
Next Incursion begins Sept 28
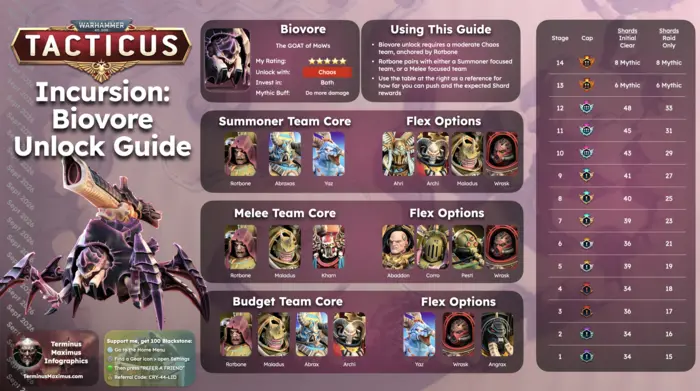
Biovore Incursion Guide
Chaos team cores, flex characters, and power-up priorities to help your roster survive the Biovore Incursion.
About Me
More about Terminus Maximus.